For my second 3D print, I decided to model a Pikachu pen holder. (A big step up from my simple first print.) It’s only my second day of Fusion 360, so let me note down how I made this, step-by-step.

How to model a Pokemon Pen Stand with Fusion 360 for 3D printing:

Create the base
Create a cylinder by going to Solid>Create>Cylinder. Click on the ground surface, then the (0,0) coordinate. Make the diameter 100mm, and the height 3mm.

Split the top face
Click on the Top of the View Cube. Select the top cylinder face and hit Solid>Sketch.
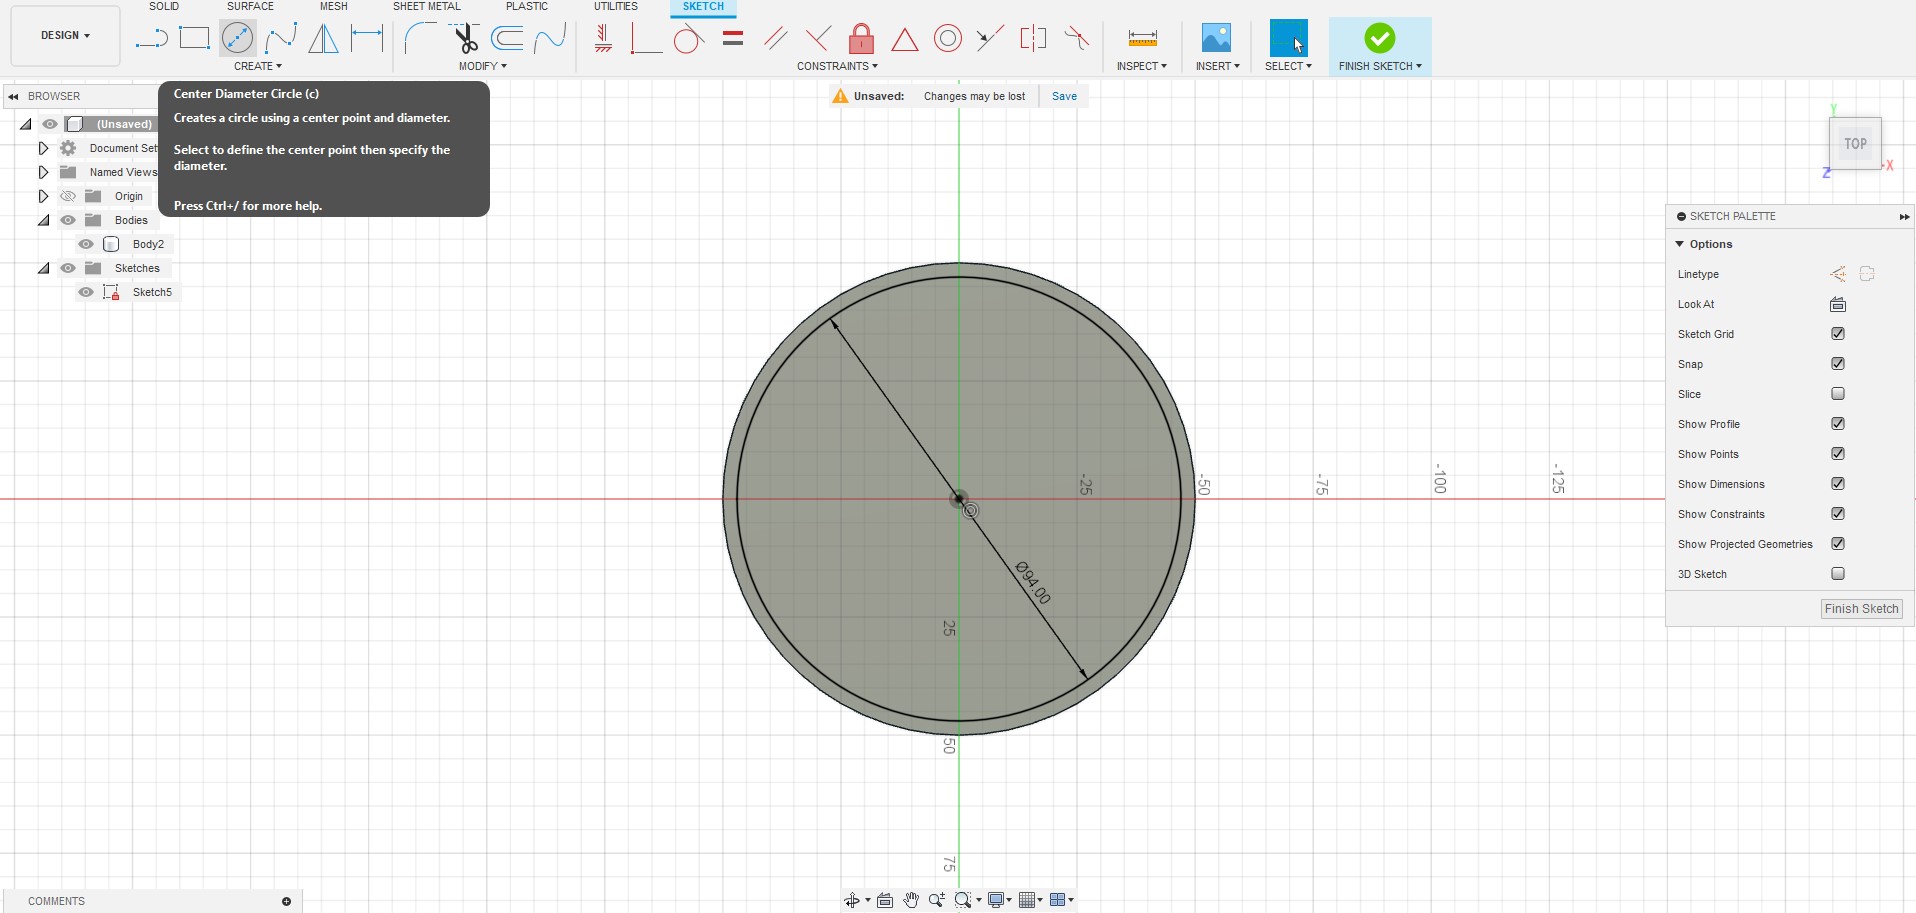
In the Sketch tab that it opens, click on Center Diameter Circle. Click on the cylinder’s centre point at (0,0), then enter 9.4mm for the diameter.
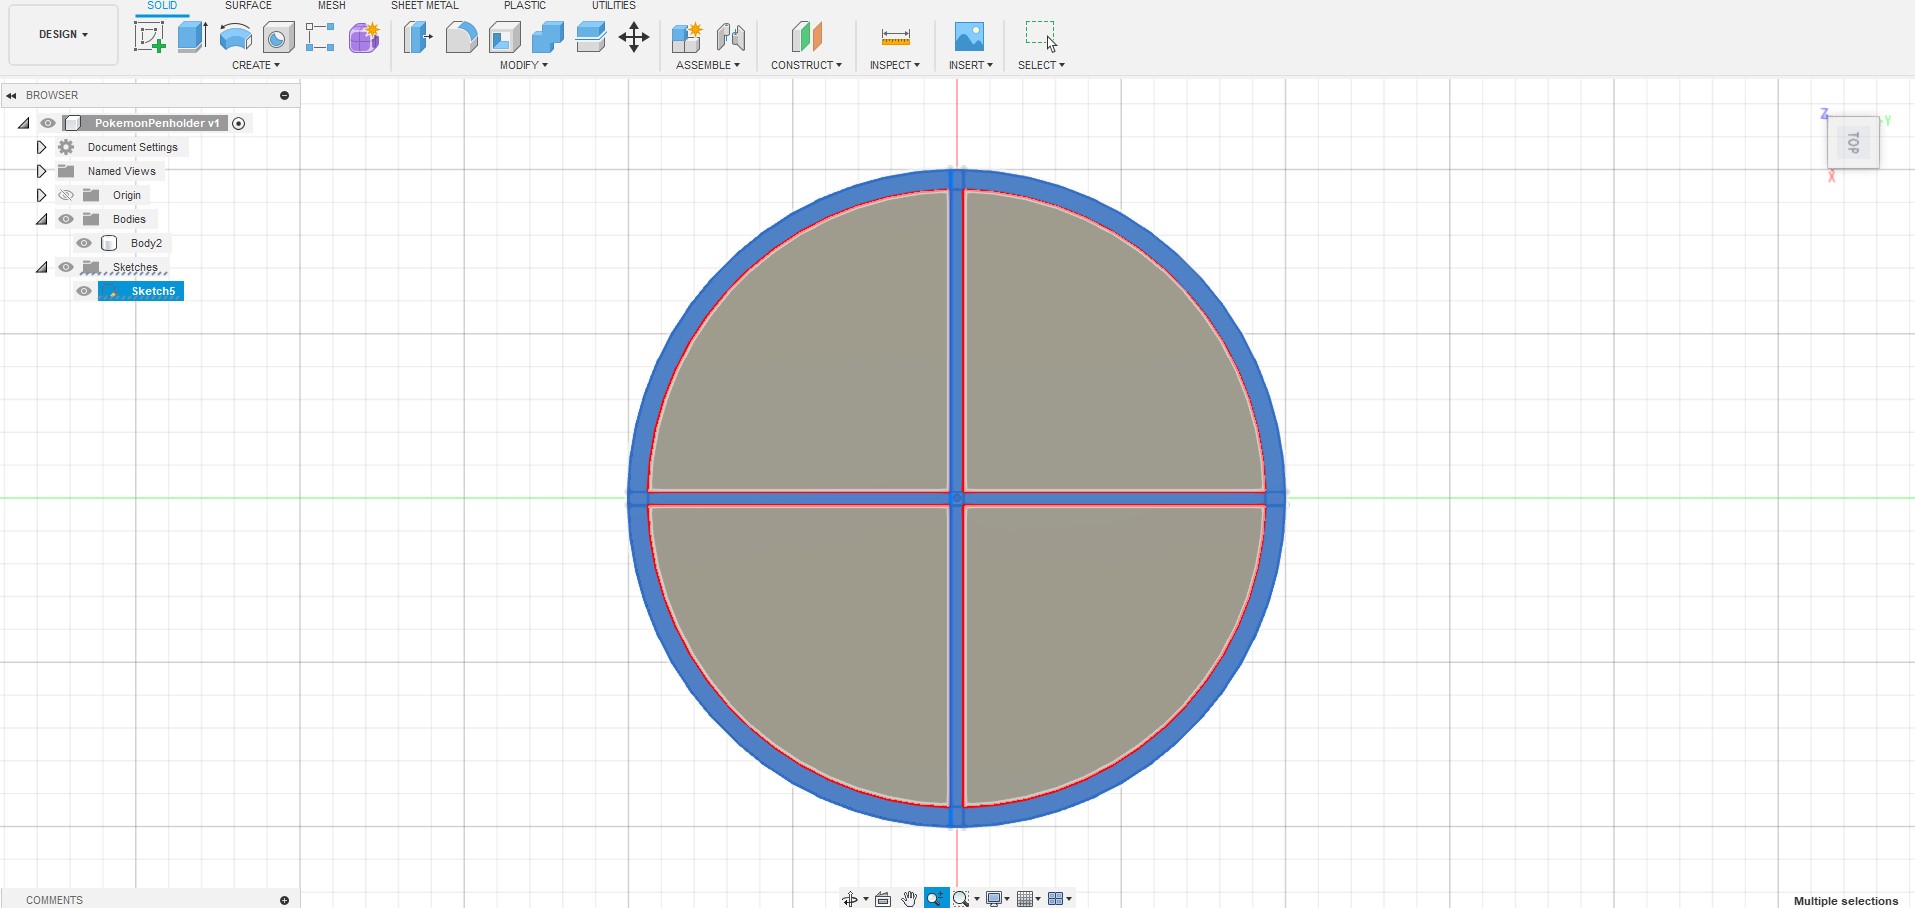
Now click on Line and click on the outer circle’s perimeter to start a line, then click on the other side of the circle to end the line. Do this again to make 2 horizontal lines across the new circle.

Still with the Line tool, make vertical lines across the new circle.

Click on the Select tool, then click and drag the lines to fine tune their location so that they are roughly 2mm apart. Zoom in and use the grid as a guide.

Extrude the sides
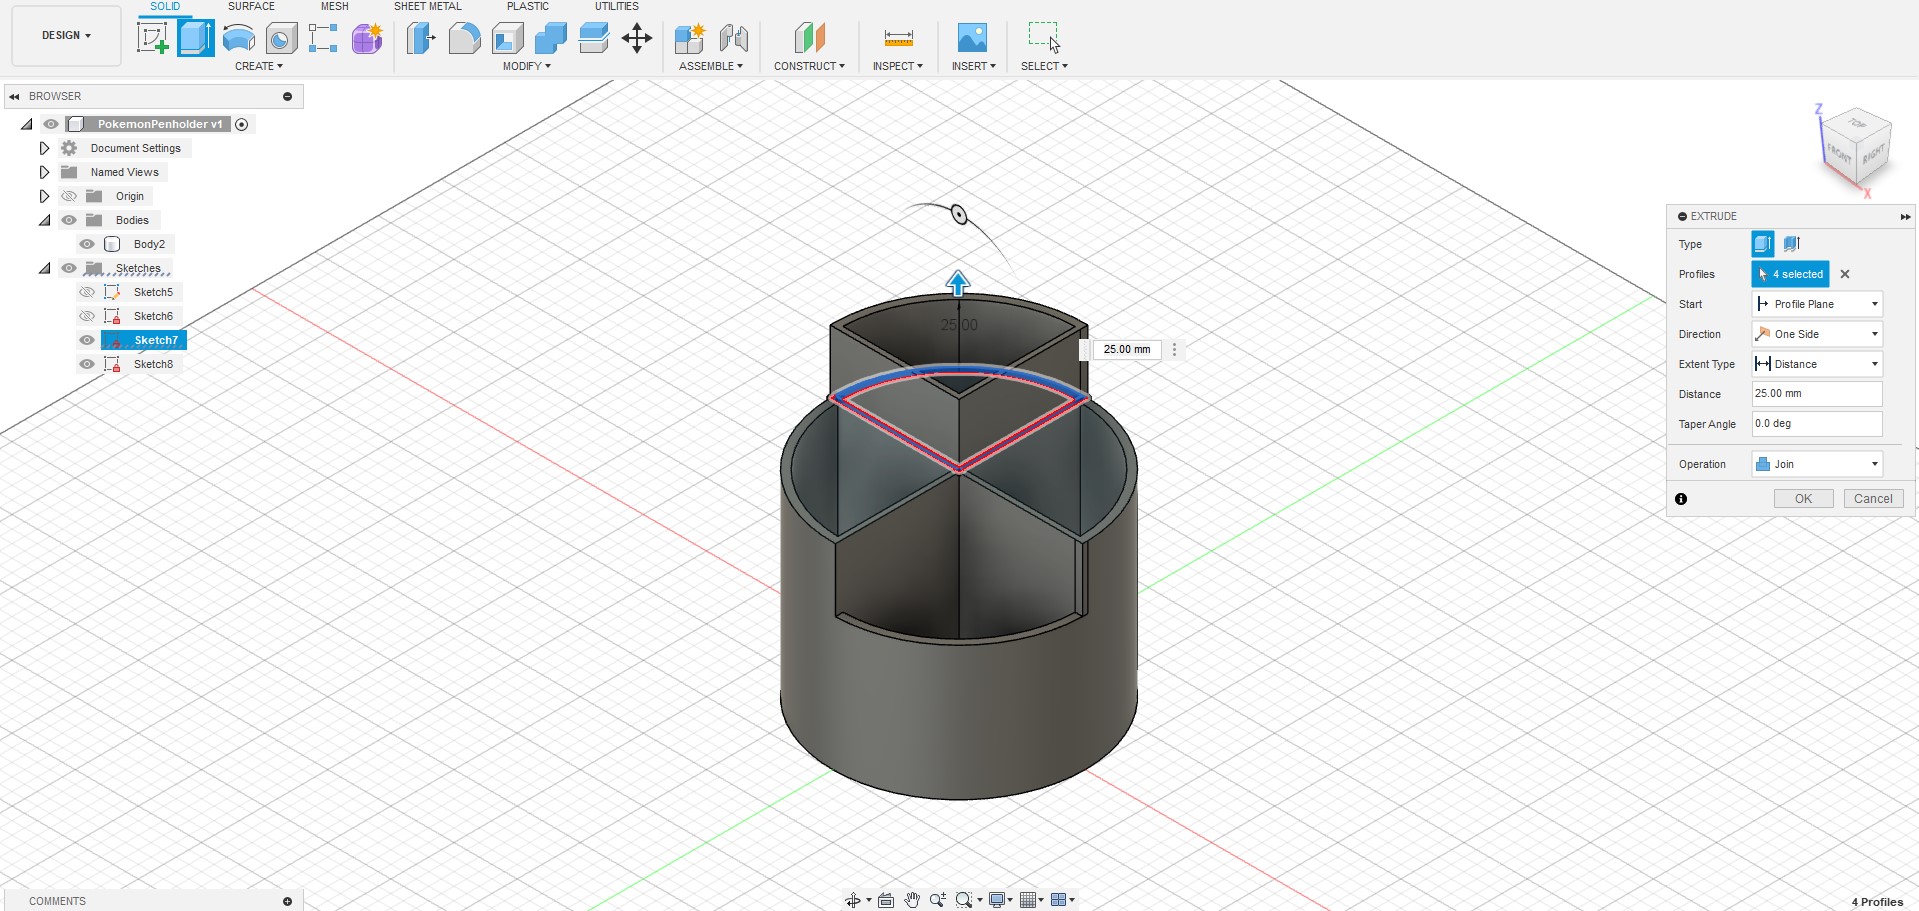
Hit Finish Sketch, then Select the faces to extrude (highlighted blue). It helps to zoom right in to select the small faces.
Fire off Modify>Press Pull and extrude the selected faces upwards by 5cm.

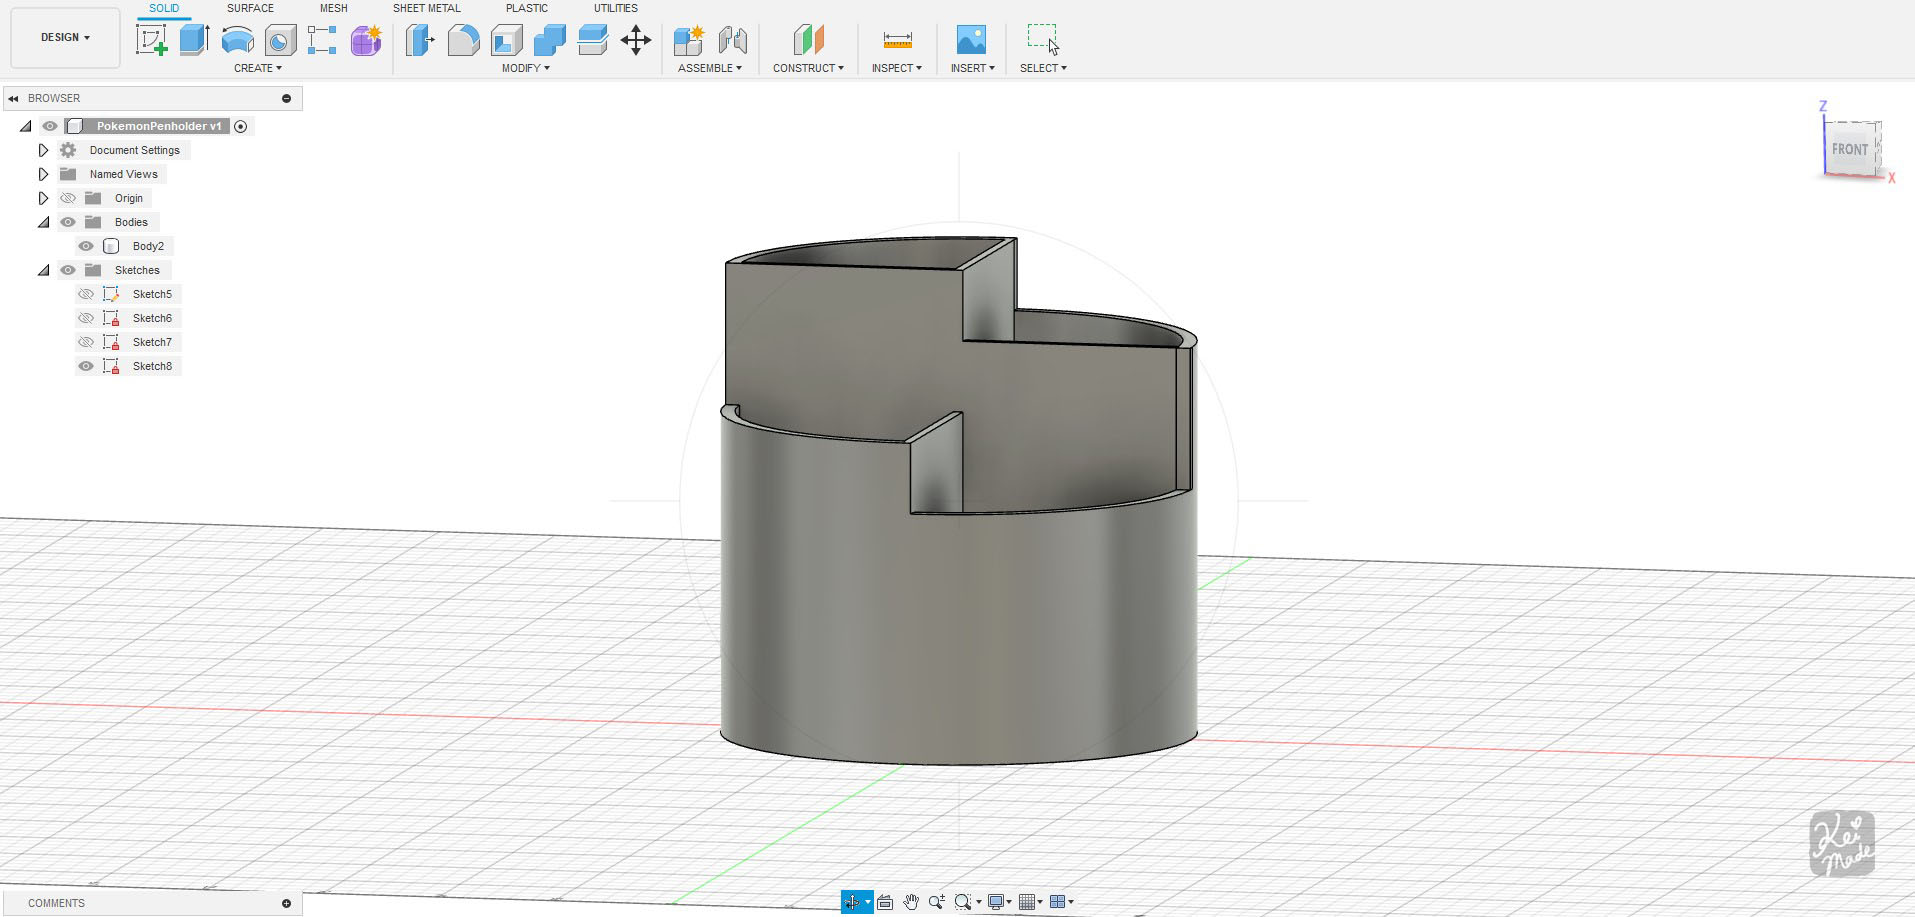
Split and extrude tiers
After extruding, we’ve lost the extra lines we drew, so re-draw the lines to do the next extrude (Solid>Sketch>Line).

Select the faces to extrude, then Modify>Press Pull to extrude it upwards by 25mm.

And repeat again to extrude the third tier.
Finalise the height of the tiers
If you want to change the height of the tiers, select the face to adjust and hit Modify>Offset Face to raise or loser the tier.

I raised one of the middle tiers by 10mm, and lowered the other middle tier by 5mm.

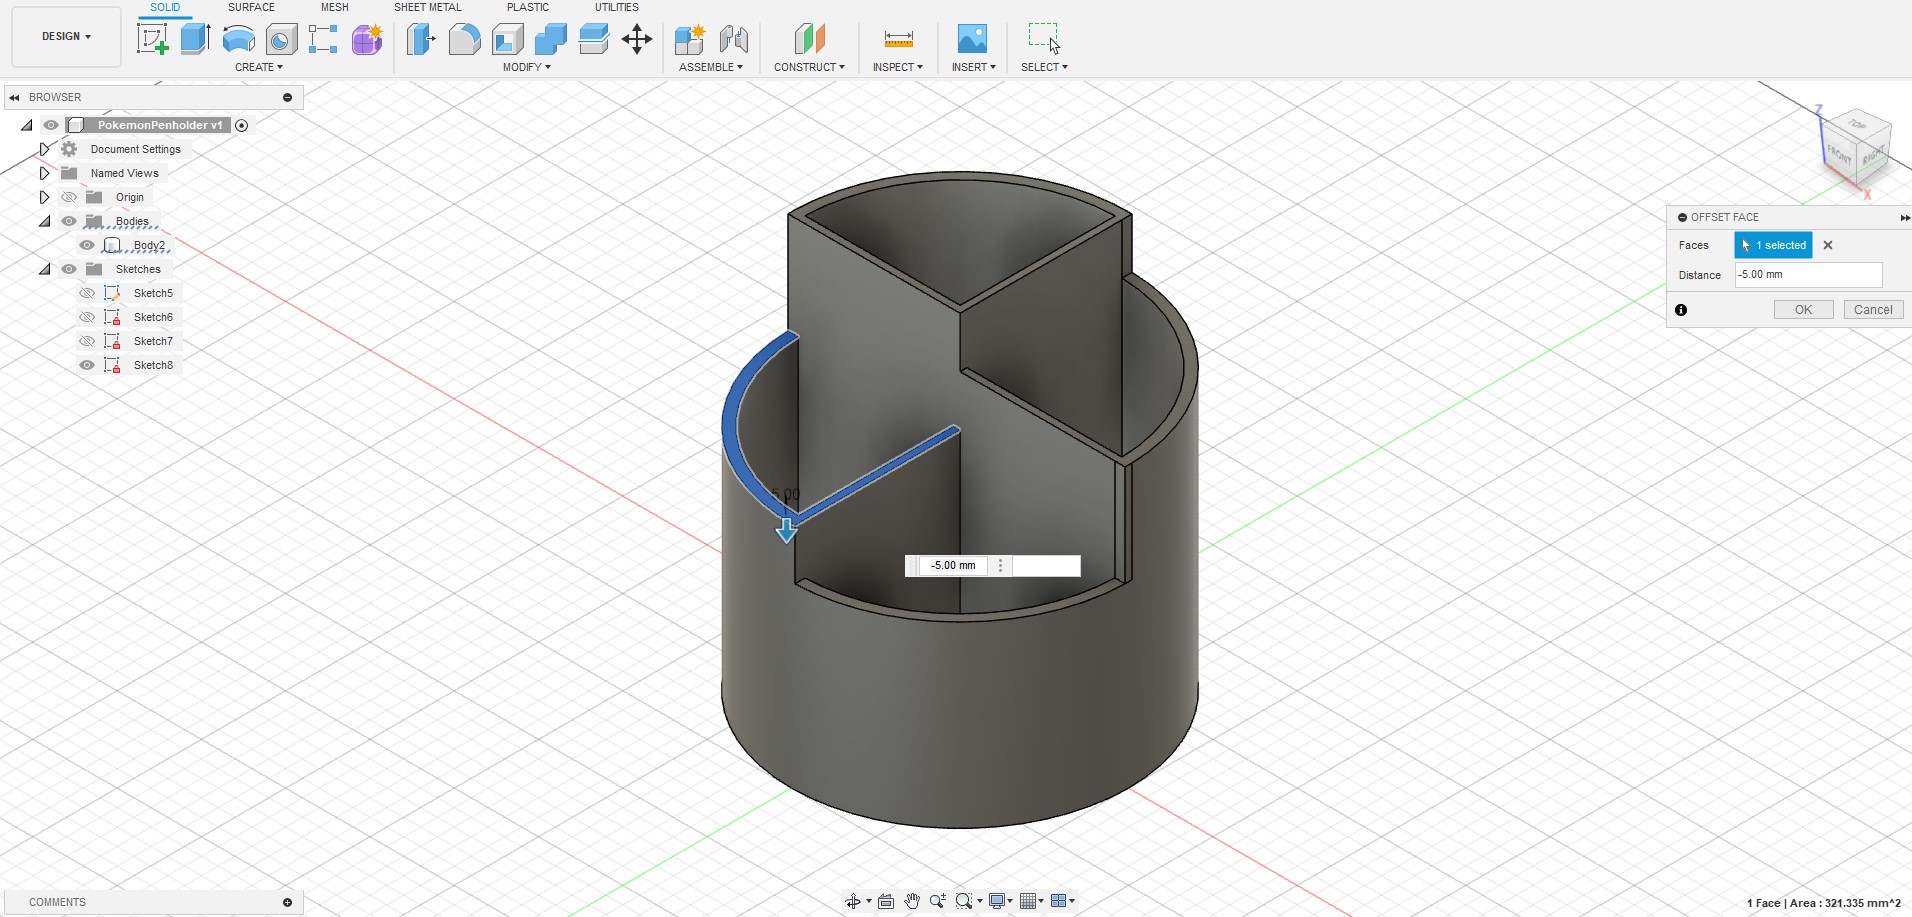
This balanced out the final shape a bit better.
Import & Emboss a Pokemon SVG
SVG images were exported from Illustrator using File>Export As (instead of Save As or Export Selection which can sometimes cause problems when importing).
Go to Insert>Insert SVG to import an SVG image to emboss onto the pen holder. Select the front plane to insert it into; it will insert it along the 0 axis, and it can import it inverted and rotated, so move and rotate the SVG image to fix up its orientation, size, and location. When done, click Finish Sketch.

Move the pen holder behind the SVG image, and rotate it 45 degrees so that the placement of the image looks perfect from the Front view.

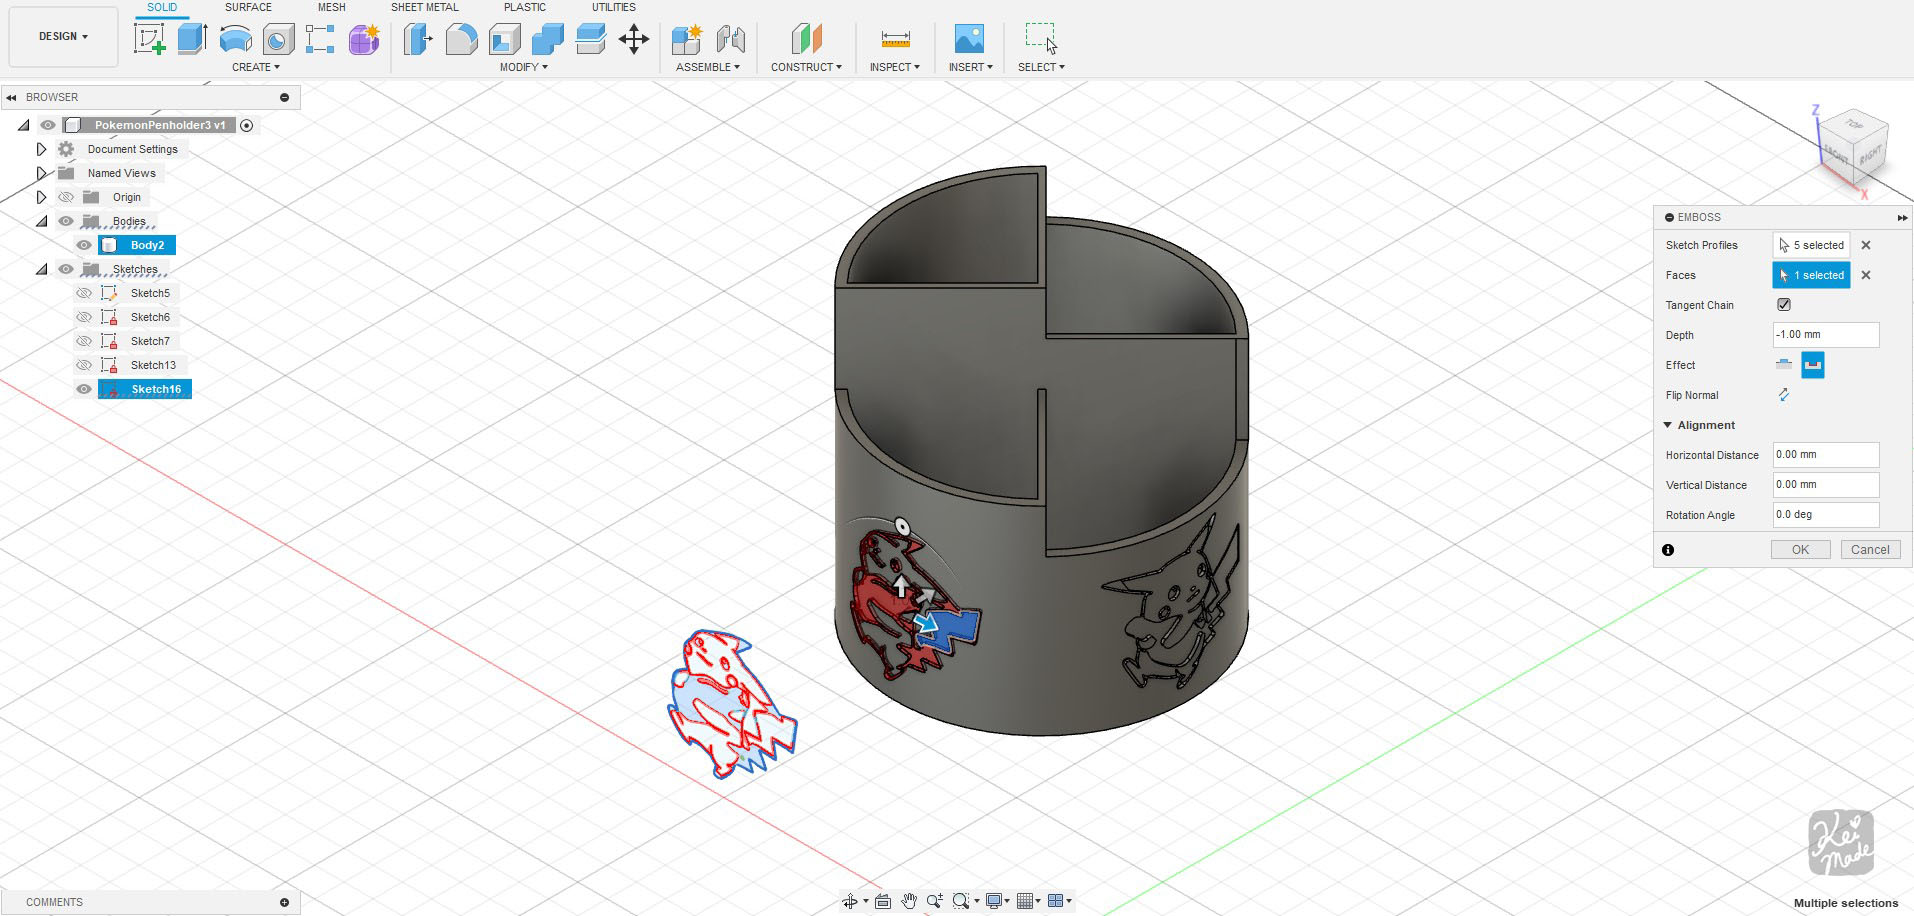
In the Front view click on Select, then select the faces of the SVG image that you want to emboss. Zooming right in helps select small faces.

While the faces are selected, go back to Isometric view and fire off Solid>Create>Emboss.
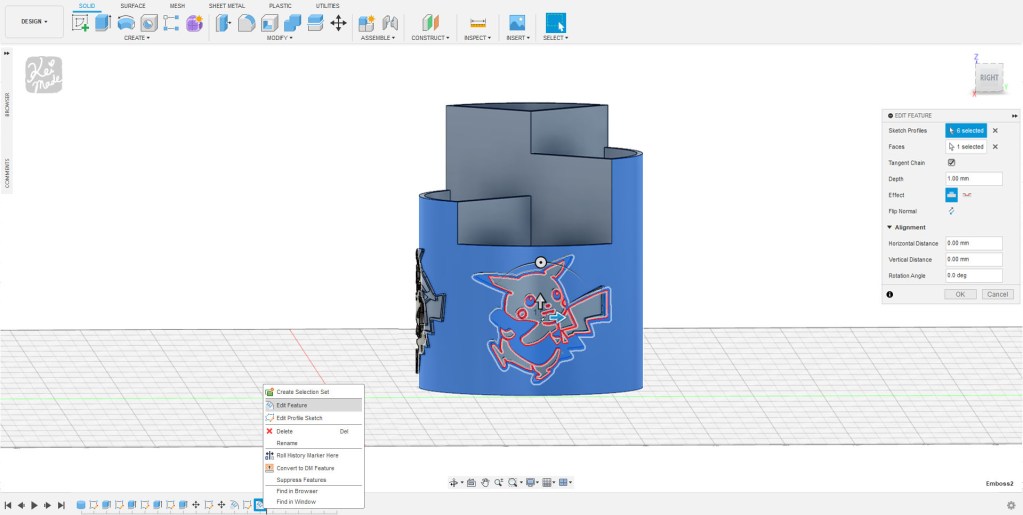
The Sketch Profile is pre-selected. Click Select next to the Faces field, then click on the pen holder’s outer face. Select to deboss at a depth of -1mm and hit OK.

And here we have a cute Pikachu debossed onto a side of the pen holder!

I repeated the same steps to emboss more Pikachus around the pen holder.
To add 3 more Pikachus, I rotated the pen holder 90 degrees, then inserted a different image to the front plane, and embossed selected faces onto the pen holder.
Export for Slicer

I went to File>Export and exported the model as a .obj to open it up in Slicer for 3D printing.
But by going to File>3D Print, you can refine the fidelity of the curves by lowering the value of Surface Deviation under Refinement Options; turning on the Preview checkbox allows you to see how detailed the exported mesh will be. You can export the mesh as as 3MF, OBJ, or STL.

The 3D print
This was my second ever 3D printing project, so I wasn’t sure the debossing would turn out well enough, but it printed well even on the quick print setting with PETG without surface refinement 😀


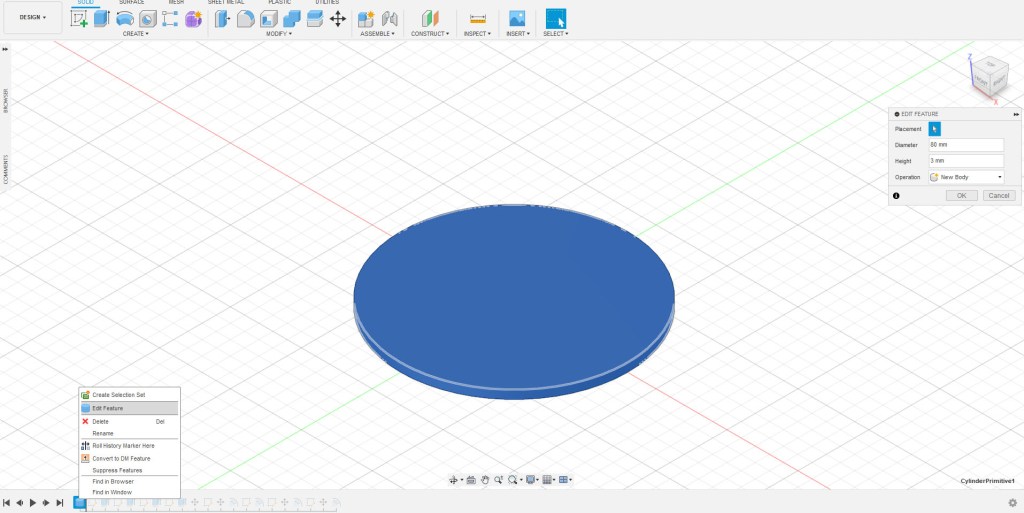
Bonus: Changing the base dimensions at the end
The width of the pen stand can be changed after extruding and embossing,
In Design mode, go to the start of the of the timeline right after the base was created. Right-click on the cylinder creation, and click Edit Features. Enter a different number of the diameter (eg. 8).
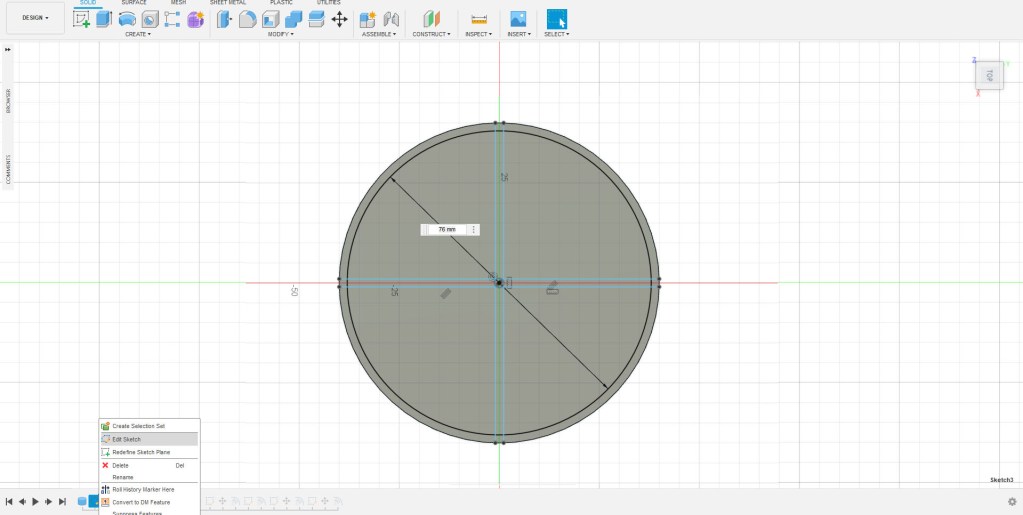
Move the timeline to the next step (after the first sketch), right-click on the sketch step, and click Edit Sketch. Enter a different number of the circle created (eg. 7.6).
You can also change the deboss to an emboss.
When you move the timeline back all the way ’til the end, the pen stand model and de/embossing stays intact.


Comments (1)
Manipulating Faces and Edges in Maya: Modelling a Wheelie Bin – Kakes3D Learning Mayasays:
July 21, 2023 at 7:53 pm[…] DIY Pokemon Pen Stand: How to split faces, extrude & emboss SVG in Fusion 360 […]