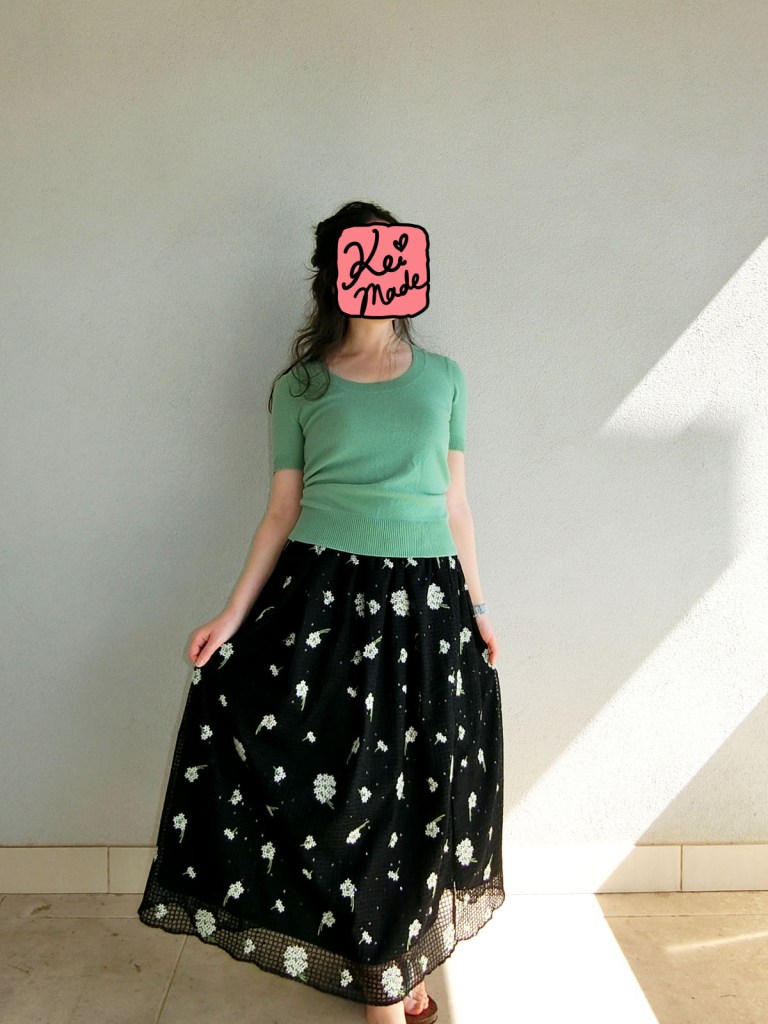
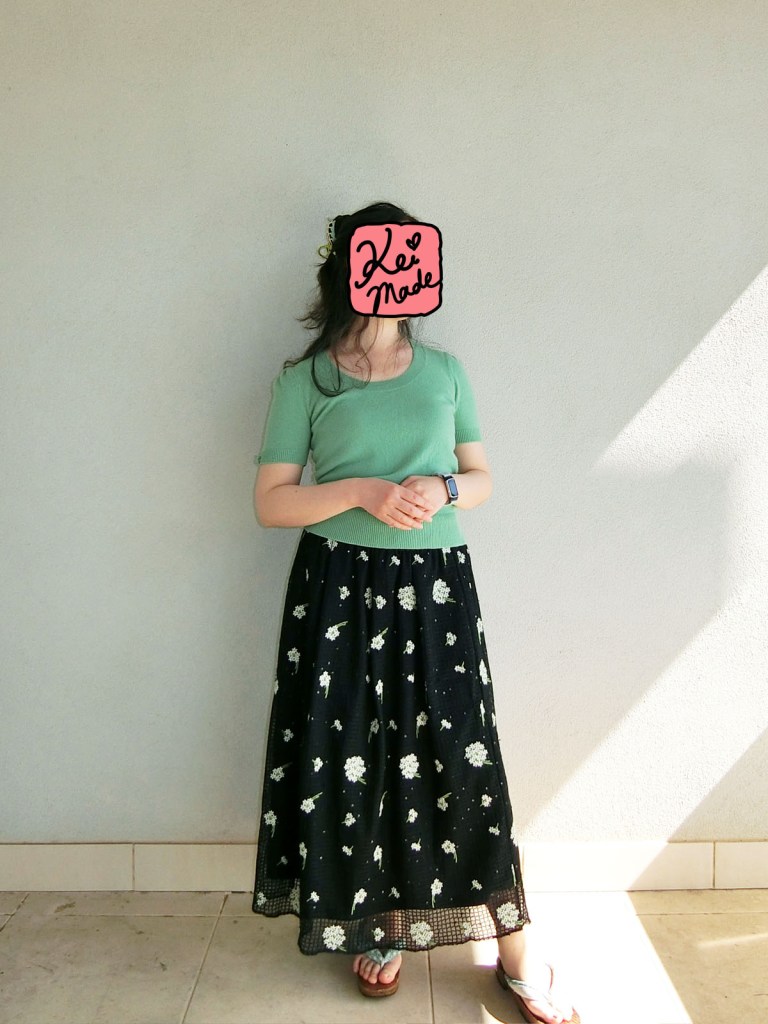
I thought I’d make a black layered tulle midi skirt with flower embroidery. Here’s my pattern and the making.


Layered Skirt Pattern
The skirt panels will be soft pleated together, then gathered with an exposed waistband elastic.
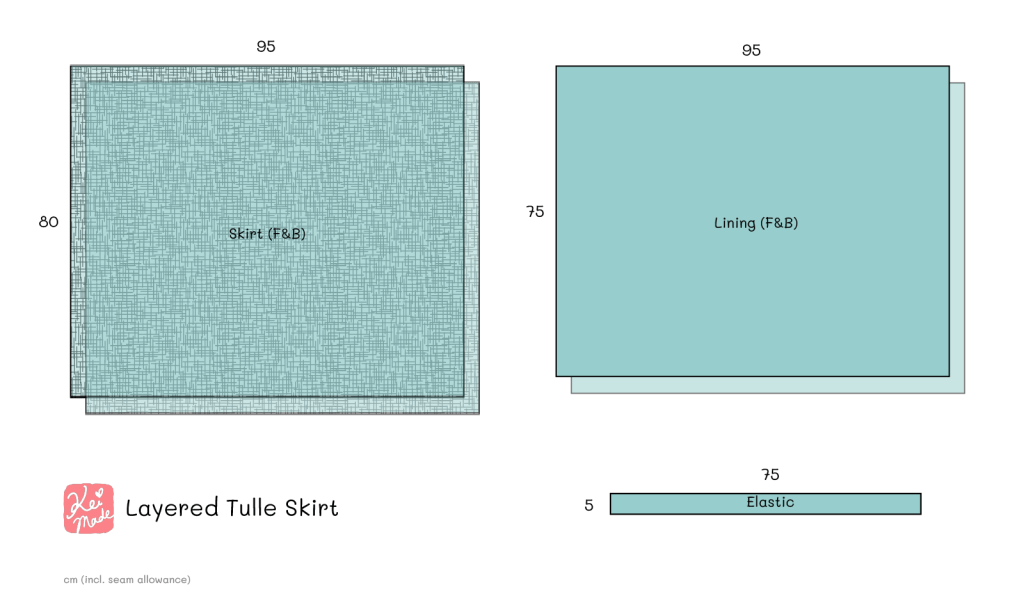
I bought 2m of deadstock stretch knit fabric from ebay, and 2m of embroidered mesh fabric from AliExpress to make this skirt. No pockets this time, as the outer layer will be the tulle.
The Sewing (step-by-step)
This is how I made this layered skirt; there was a trick to the ordering to make life a lil’ easier.
- Cut out two pieces of lining fabric (95 x 75cm).

2. Cut out two pieces of tulle fabric (95 x 80cm).
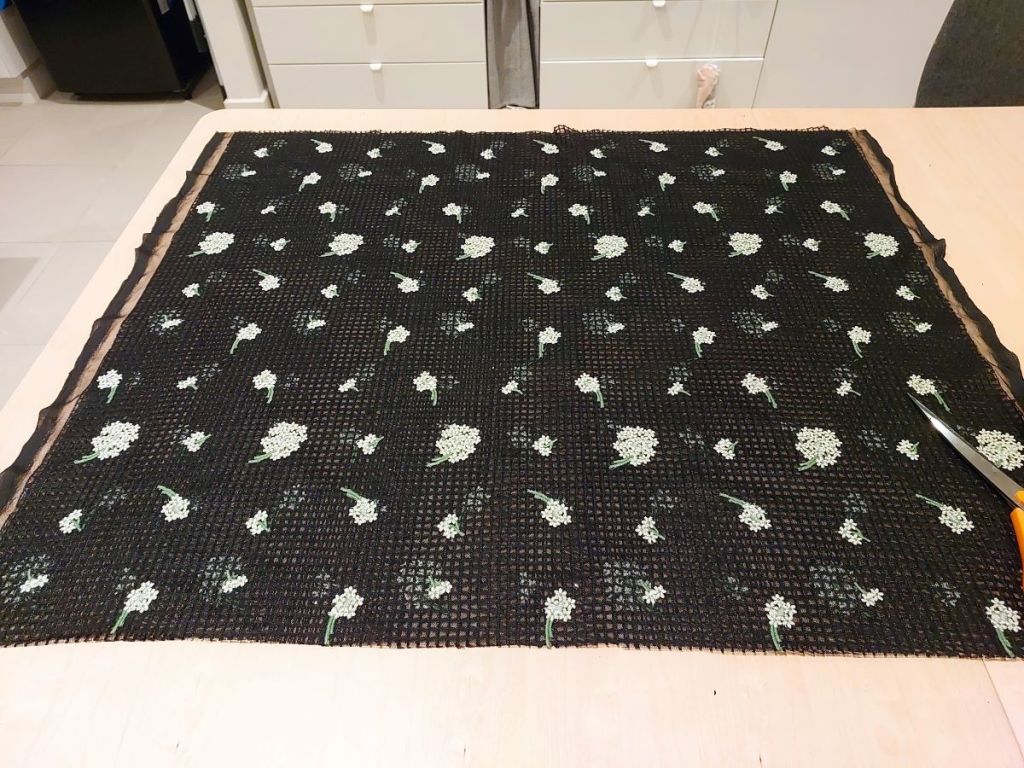
3. Place one tulle fabric on top of one lining fabric, both facing up.
Fold the two fabrics together to make soft pleats. (See below for pleating dimensions)


Pleats are made early, as it’s easier to do while the fabric can lay flat.
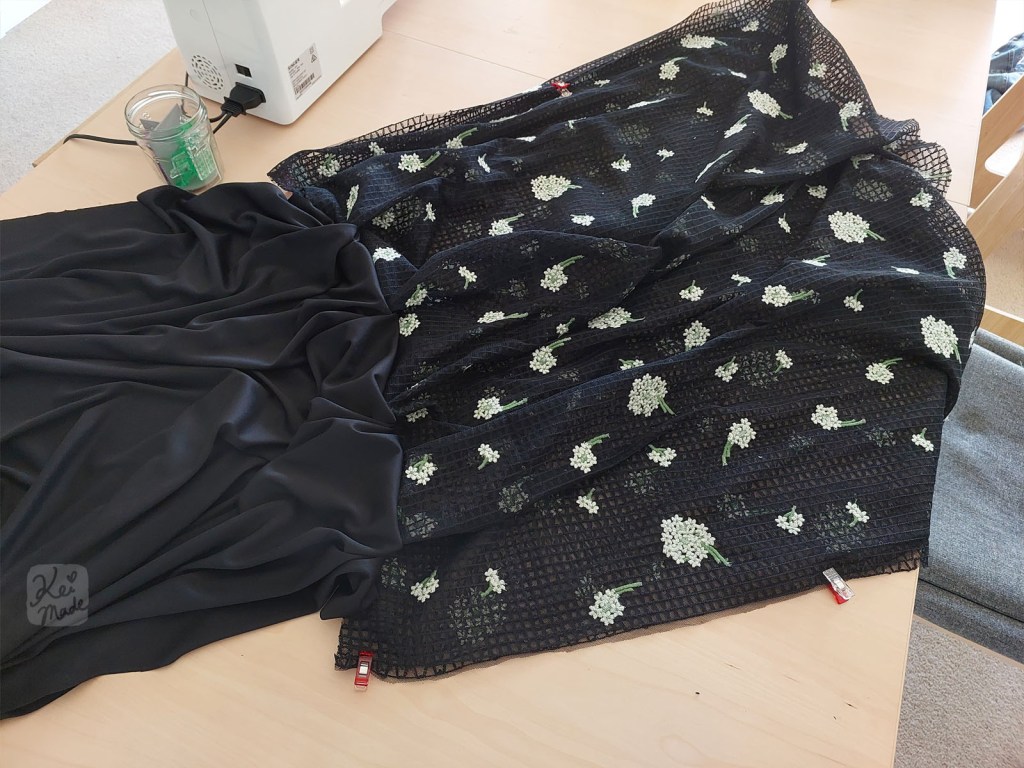
4. Sew the pleats together, about 1cm from the edge, leaving 10cm gap on both sides. (See pink line)
Repeat steps 1-4 for the back side of the skirt.

The gap on both sides is needed to keep the the vertical edges of the tulle and lining separate; they’ll be sewn down separately to make a layered skirt.
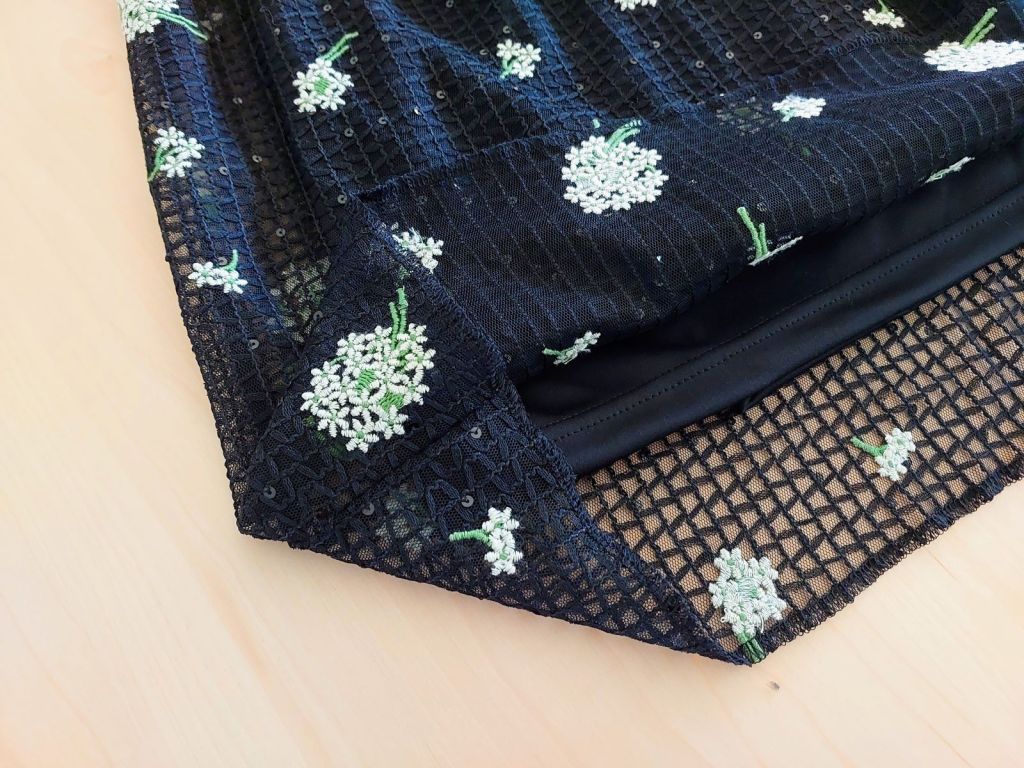
5. Face the front and back tulle fabrics inside out. Serge down along the two sides of the tulle skirt from top to bottom (along the red clips).
This makes the tulle fabric into a tube.
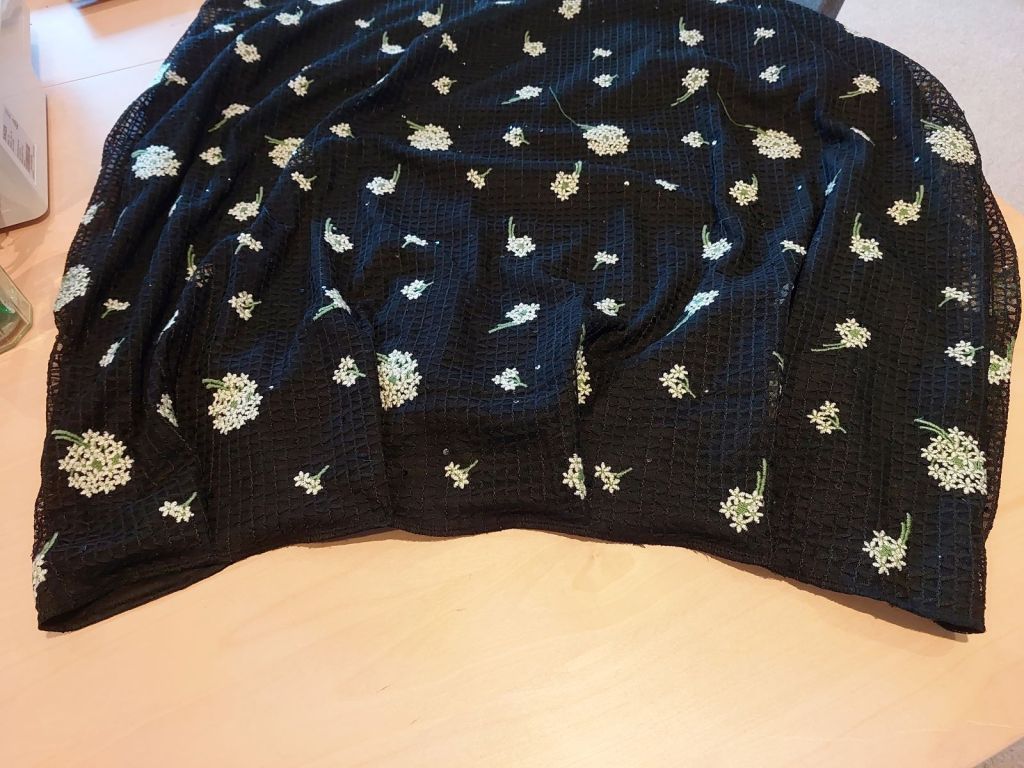
6. Turn the whole skirt inside out and serge down along the two sides of the lining fabrics from top to bottom (along the red clips).
This makes the lining fabric into a tube.

7. Turn the skirt right way out.
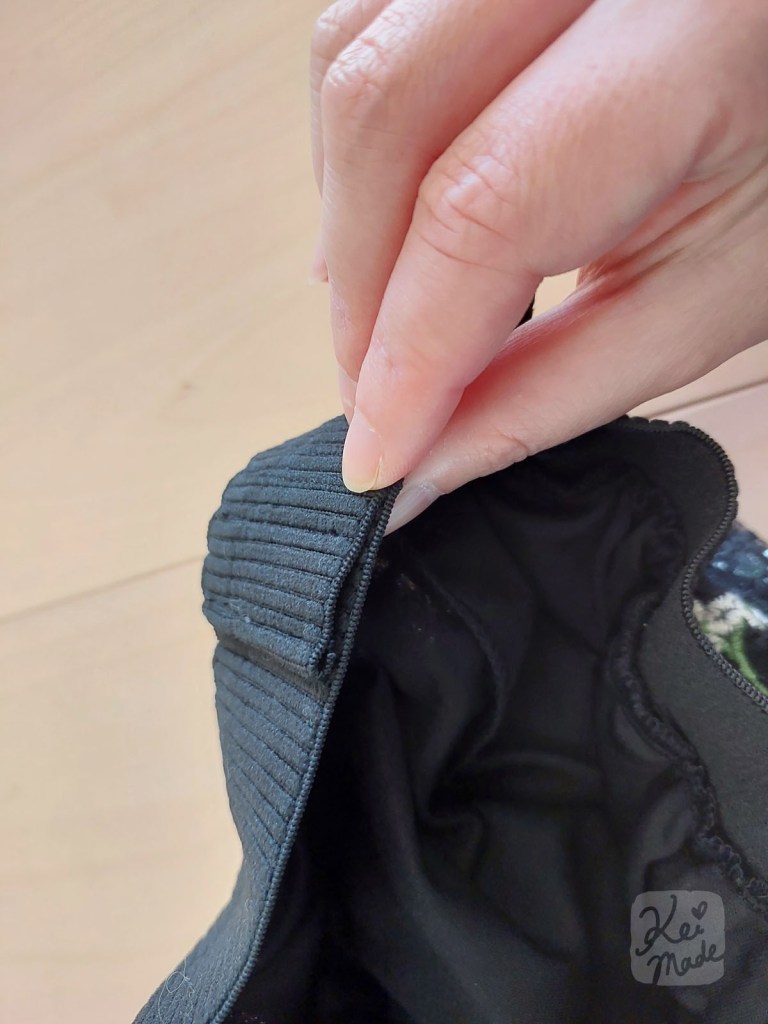
Serge around along the top of the skirt to secure the tulle and lining fabrics together.
8. Cut a piece of wide elastic to the desired waist dimensions + 3cm. Sew it into a loop (see below).
Sew the elastic to the skirt to make an exposed elastic waistband. (Pull the elastic to match the fabric while sewing them together.)

The elastic was made into a loop, inside out, and the shorter edge was cover stitched. This was folded over, right way out, and the other edge cover stitched. Then the waistband was secured with lock stitches.

9. Lastly, hem the lining fabric with a cover stitch, and tulle hem with an overlock.
A few hemming methods were tested on scrap tulle fabric – including narrow hem and rolled edges.
The only successful one with this tulle was hemming with a wide overlock (Width 6.5, Length 2.5, Neutral differential feed, Tension dial max).
See overlock and cover stitch settings for these fabrics
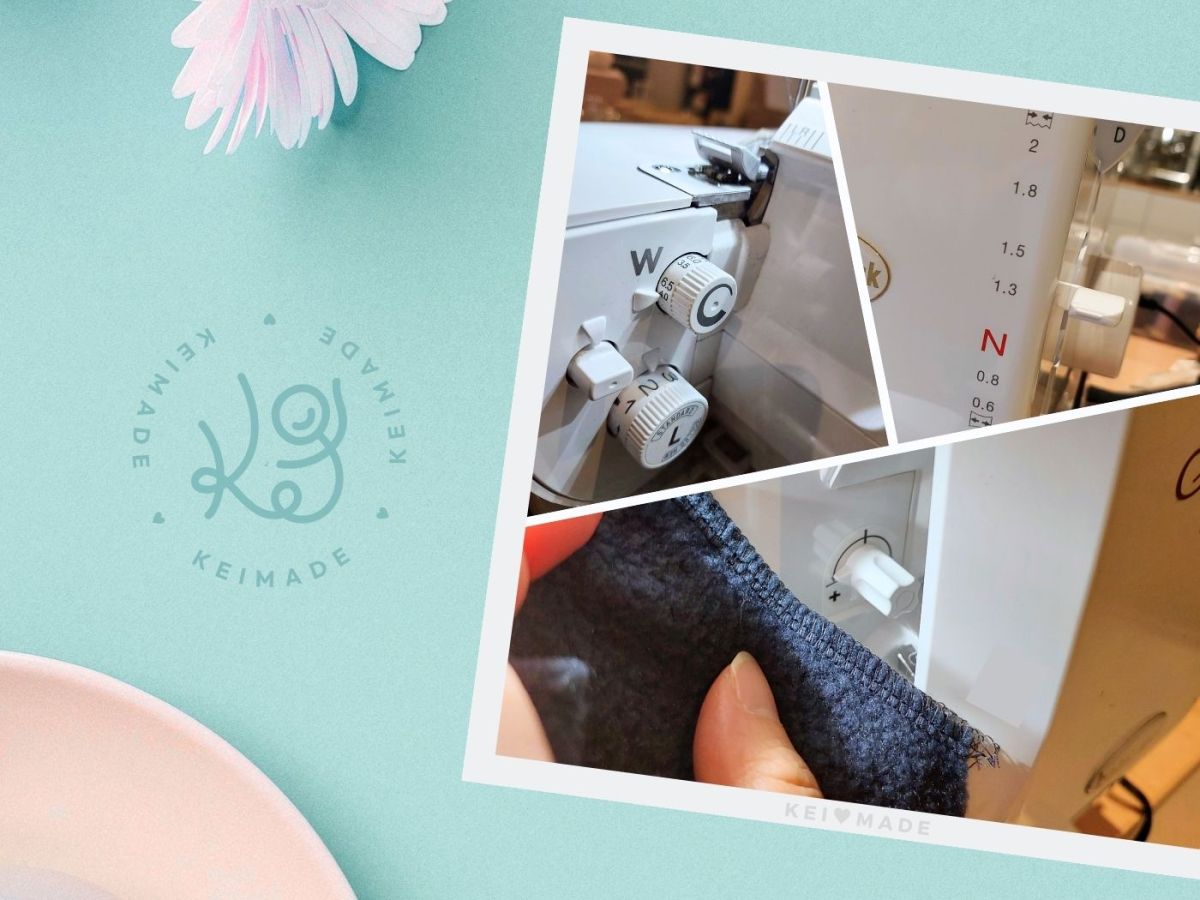
Babylock overlocker settings for serging common & specialty fabrics
I wanted to put together a growing list of overlock and cover stitch settings that have been working great for the fabrics I’ve been serging with my new Babylock machine.…
Complete!
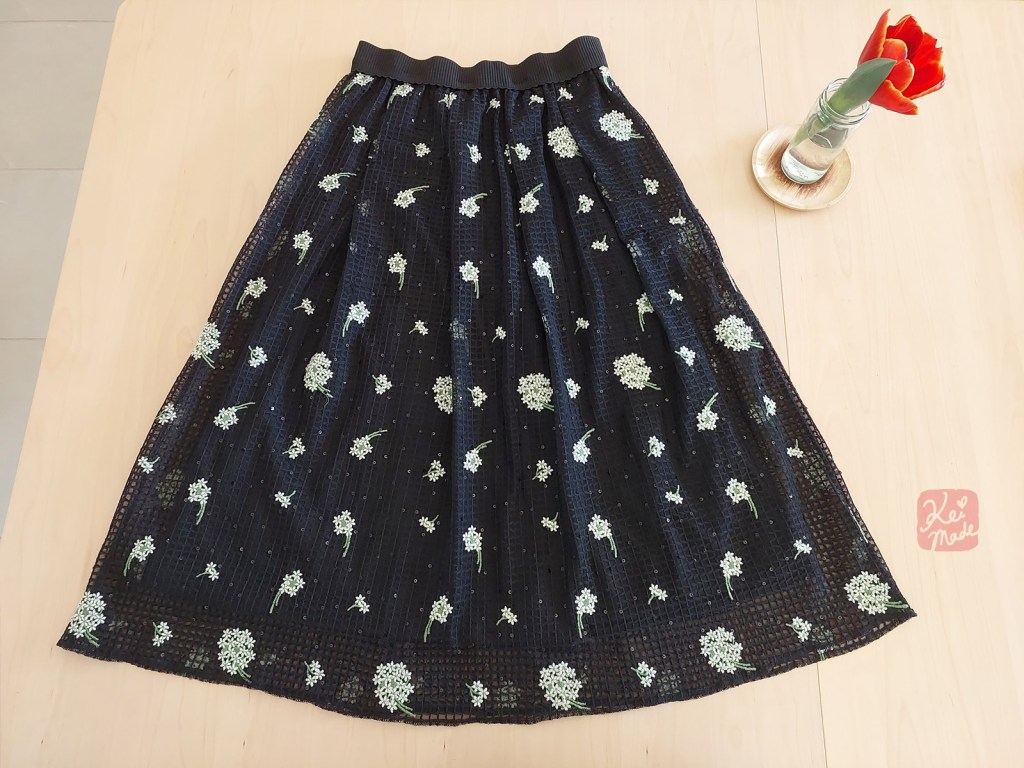
This skirt is on the heavy side, so it maintains its drape and doesn’t get lifted up by the wind 🙂


Leave a Reply